Cap Embroidery With Melco Embroidery Machines

Cap embroidery can present unique challenges. Each brand and style can be very distinct: the panels of caps are cut differently; caps come in a variety of fabrics; and the front panels are backed and constructed in varying ways. All these factors make it difficult to create a cap framing system that can fit every cap product with precisely the same results. Overcoming this challenge requires expertise in two skill sets: digitizing and machine operation.

Digitizing

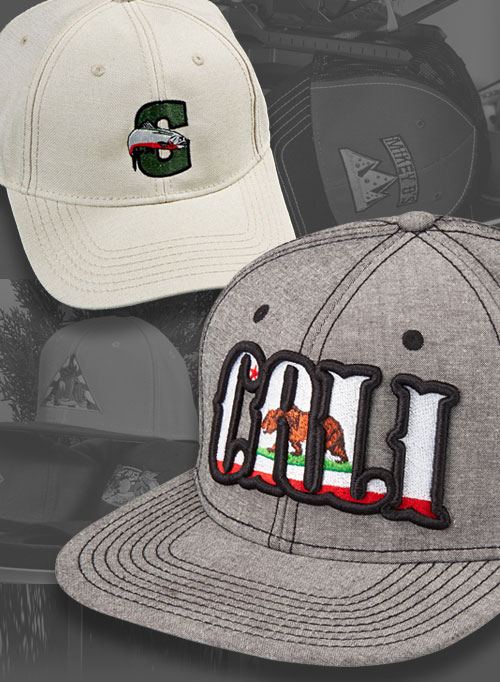
A design that has been digitized for a left chest application may not necessarily be suitable for a finished cap application. This is because the construction elements found in a particular design may not be suitable for a suspended, arched cap frame. Cap embroidery involves unique challenges due to the variations in cap construction, making it essential to consider the design elements carefully. Some design elements that work well for left chest applications, such as small details or fine lines, may not translate well onto a cap. Therefore, it’s important to have expertise in digitizing to ensure the design is suitable for the specific cap application.

  • Fill stitching—This one stitching element exerts the greatest amount of linear pull on the fabric. One simple way to minimize this pull is to choose a stitch direction that runs parallel to the narrowest dimension of the fill. For example, if the fill area is a 1” x 4” rectangle, the narrowest dimension is the 1” dimension. Choose the fill stitching to run parallel to this dimension.
  • Fill stitching on 6/4 caps (caps with a seam down the front) – When running a fill stitch over a front cap seam, DO NOT run the stitch parallel to this seam. Choose a slight diagonal angle for the best results. The use of a light-density, crossed, diagonal underlay will also help to support the top stitches.
  • Fill sectioning – How the fill is constructed can easily create puckering or gathering of fabric. A single fill area on a cap front should NEVER be sectioned. With today’s digitizing software, your chosen exit point will likely determine whether or not the fill area becomes sectioned into several pieces. Some shapes have to be sectioned by their nature. When this occurs, make sure the fill rows progress in the same direction to minimize any puckering.
  • To avoid registration problems, complete free-standing elements of a design with all colors before moving on to the next element.
  • To avoid distortion to lines or arches of lettering, always do them as the last elements.
  • Another trick is to build the elements of a design from the center of the design outward, alternating over the center seam. For example, if the design consisted of the numerals from 1 to 5, start by digitizing the numeral 3 first, then do the 4, then do the 2, then 5 and finally the numeral 1. The sequence 3,4,2,1,5 would also work.

Machine Operation

There are several things the machine operator can do to improve the run-ability of caps:

1) Needle selection – As a rule, finished baseball caps should only be run with sharp needles in a size 75/11

  • Sharp needles are necessary to minimize the possibility of needle deflection and needle breaks due to Buchram backings, “fly swatter” backings and front center seams. Even fine ball points can deflect enough to cause unnecessary needle breaks.
  • Needles with diameters less than 0.75mm (75/11) can easily bend under the tension of the thread. This bending (deflection) can then lead to needle breakage.

2) Backing materials – Finished baseball caps come with a variety of front panel backing options as follows:

  • Unstructured caps have no backing materials used to stiffen the front of the cap. The only additional material used may be the Polyester tape used to finish the back of the center seam on the cap. Without proper backing to stabilize the fabric, the stitches will pull and gather or pucker. Embroidery backing suppliers carry a special backing for caps. It comes pre-slit to a width of about 4” and can be bought in a roll or pre-cut to lengths of about 12”. The composition of this backing includes more paper or cardboard content to stiffen the “hand” of the product. This composition is what provides structure to the cap front for the embroidery process.
  • Structured caps are constructed using a fused material such as Buchram or Pelon attached to the back of the front panel to stiffen the material. Depending on the design elements, sometimes this cap can be embroidered with little or no embroidery backing at all. If the design has a lot of fill stitching, the cap backing mentioned above, may be necessary.

3) Framing techniques – Most cap frames come with a “jig” or hooping fixture to hold the cap frame while framing.

This is an important tool. It usually clamps to the edge of a work table and should be ergonomically mounted at a height that accommodates our forearms at a horizontal orientation. This fixture is usually designed with a curved surface to emulate the sewing plane when the cap frame is in the machine. If the cap is unstructured or the design has a lot of fill stitches, some manufacturers include “buffalo clamps” that may be attached to the back of the cap to hold the front surface tight against the sewing plane. If the cap is structured (usually a fused Buchram or heavy Pelon backing), these clips may be omitted to speed up production.

4) Thread Feed (Tensioning) – The final piece of this puzzle lies in proper thread feed (tensioning) for finished caps:

  • On machines that use tension knobs, the knobs have to first be properly balanced to get consistent thread tension. Once this is accomplished, finished caps usually require a little more thread tension that flat applications. On some machines, a little more bobbin tension may also be necessary.
  • On the MELCO machine that uses a Acti-Feed system, some slight adjustment may also be necessary. You may first start out using the auto feed settings when running caps. If you experience any thread or needle breaks, consider using the manual settings. Remember to compensate for more layers of material when sewing on a cap front. This means more stitch depth and thus a little more feed than sewing a left chest application.

Final Thoughts

One last thought when embroidering caps: do both the front and side panels on the same run. Even though cap frames were designed to run embroidery on a horizontal plane that theoretically spans 270 degrees of cap frame rotation, the actual sewing field may be limited. Once again, the construction of the individual cap will dictate whether you can comfortably frame that particular style of cap and effectively embroider the side panels on the same run. If the embroidery design and the cap design permit you to do so, by all means do so. If you can’t turn the sweatband where it is sewn to the adjustment strap, consider another option for that application. Sew the front embroidery as you normally would and then run the sides with a different framing system designed by Fast Frames, either the clamping model or the one that uses sticky backing.

Once you learn the skill sets to work with this unique medium, you will find excellent results with minimal additional effort.